Author Archive: ken@kenrieves.com

Busy Summer

It’s been a busy summer at the new house. Fortunately, most of the big chores are complete (for now). As every homeowner knows, the work is never really done. This summer we had three large red oak trees taken down. All three were dead and would eventually come down on their own. But, since they were each about 100 feet tall, it was safer to taken them in a controlled way.

Three Dead Red Oaks
They had to use a crane to prevent damage.
Using a crane to lower logs into a dump truck. Each log weight several thousand pounds.
The empty spot were the trees stood. The stumps were ground and fill dirt added.

It looks so much better without the dead trees. It opens up the lot and really improves the view. The next project was a raised vegetable garden with copper box trellis. I’ll cover that in another blog post.

Thanks for reading!

Ken

Chowder? Yes, please.

I hate the fact that I have to watch my salt intake. But I’ve been doing it for quite a while now and have found ways to enjoy foods that are generally prohibited on a low sodium diet.

One of my favorites foods was Clam Chowder. Sadly, clams are loaded with sodium. And, it’s not only canned clams, but also fresh clams that have a lot of salt in them. So, in order to enjoy the food that I like I made some adjustments that makes a great alternative. I use a variety of seafood in my chowder, cod, scallops, shrimp, and the baby clams. Firstly, baby clams have less sodium than regular clams. Next, by using other seafood, the recipe requires fewer clams, but retains the same great seafood taste.

I also use a mix of heavy cream and fat free half n’ half. This greatly reduces the amount of fat in the chowder. I use a finely chopped mirepoix as a base and then that’s built upon with the other ingredients. A mirepoix is a mix of onion, carrots, and celery in a ratio of roughly 2 parts onion, 1 part carrot and 1 part celery. I tend to use a bit more onion because I think using more carrot and celery adds too much sweetness to the base.

Mirepoix
A finely chopped mirepoix is the base.

When the chowder is complete, I serve it topped with crumbled bacon, green onion, and oyster crackers. It is so good and hearty, it’s a soup that is a complete meal.

Seafood Chowder
The final Seafood Chowder.

If you find out that, for some reason, you must give up a favorite food, try different variations. You might find that great compromise can be made that will allow you to enjoy it anyway.

That’s it for today. Thanks for reading.

-Ken.

A lot has happened since my last post

I have been neglecting my website and my blog. Since I last posted, my wife and myself have both retired and relocated back to our hometown in Kentucky. Buying a new home long distance (Cleveland was 8 hours away) in the current competitive real estate environment was certainly a challenge. However, after many house hunting trips, we were fortunate and found a really nice house in a good neighborhood. Now that we’ve gotten settled, we are waiting for Spring so we can enjoy the warm weather.

I’d like to keep the blog updated a couple of times a month, but I’ll make no promises.

The chances are that the theme of this blog will change and become more personal and not as much photography related. I’ll probably be posting more food related stories and recipes. I love cooking and will share some of the stuff I’m making. In general, we will play it by ear and see what happens.

Here are some photos from around the new house:

Copyright Ken Rieves
The home office at the new homestead.
Copyright Ken Rieves
The formal dining room.
Copyright Ken Rieves
Master Bedroom Ceiling
Copyright Ken Rieves
I love this stove!
Copyright Ken Rieves
Maggie, lounging in the TV room.

Finally, back at the blog!

This has been a heck of a winter with lots of projects competing for my attention. I hate neglecting the blog, but something had to give. So, in order to get something posted, I’ll leave a few modest photos for your amusement. I hope you like them.


Copyright Ken Rieves Photography

Frozen Waves. Waves frozen in time on Lake Erie.


Copyright Ken Rieves Photography

Self Portrait. Taken along the shore of Lake Erie.


Copyright Ken Rieves Photography

Winter Tree. A lonely tree, trapped in the snow.


Copyright Ken Rieves Photography.

Toy Truck. A toy from my childhood, basking in the sunlight streaming in from a basement window.


Thanks for reading, and I promise to keep this blog more current.


-Ken.

Carbon Transfer Prints

Several months ago I went to an photo exhibit at the Cleveland Museum of Art. The subject was the history of photographic portraiture. I was really taken by the images from the 1850’s that were created using a technique called Carbon Transfer. It is a process that has been around for a very long time and provides a very unique looking print. The amount of detail surpasses anything I’ve seen. It is light years ahead of the digital printing that is commonly used today in terms of tonality and detail.

A couple of months ago I became aware of a company in Spain that uses carbon transfer to create photographic prints called The Wet Print. The owner, Calvin Grier, is an artist that uses the carbon transfer process to create incredible images.

I’ll go over the process from the photographer’s perspective. I suggest you visit his website to see what really goes into creating the final print. The first step is selecting a image your want to print. Since the process produces a black and white image, selecting the right one is important. Next, I contacted Calvin via email and sent him a downsized image to see how well it would render via carbon transfer.

The next step was to send him the full size image in a TIF format. Since I was dealing with foreign currency (the Euro) for payment I opened an account with Transferwise in order to pay for the print.

After that, the ball was in Calvin’s court and he kept me abreast of what was happening on his end. Below are photos of the process.

Ken Rieves Photography

Negatives, tissue, and Temporary support.

Ken Rieves Photography

Exposing one of the negatives.

Ken Rieves Photography

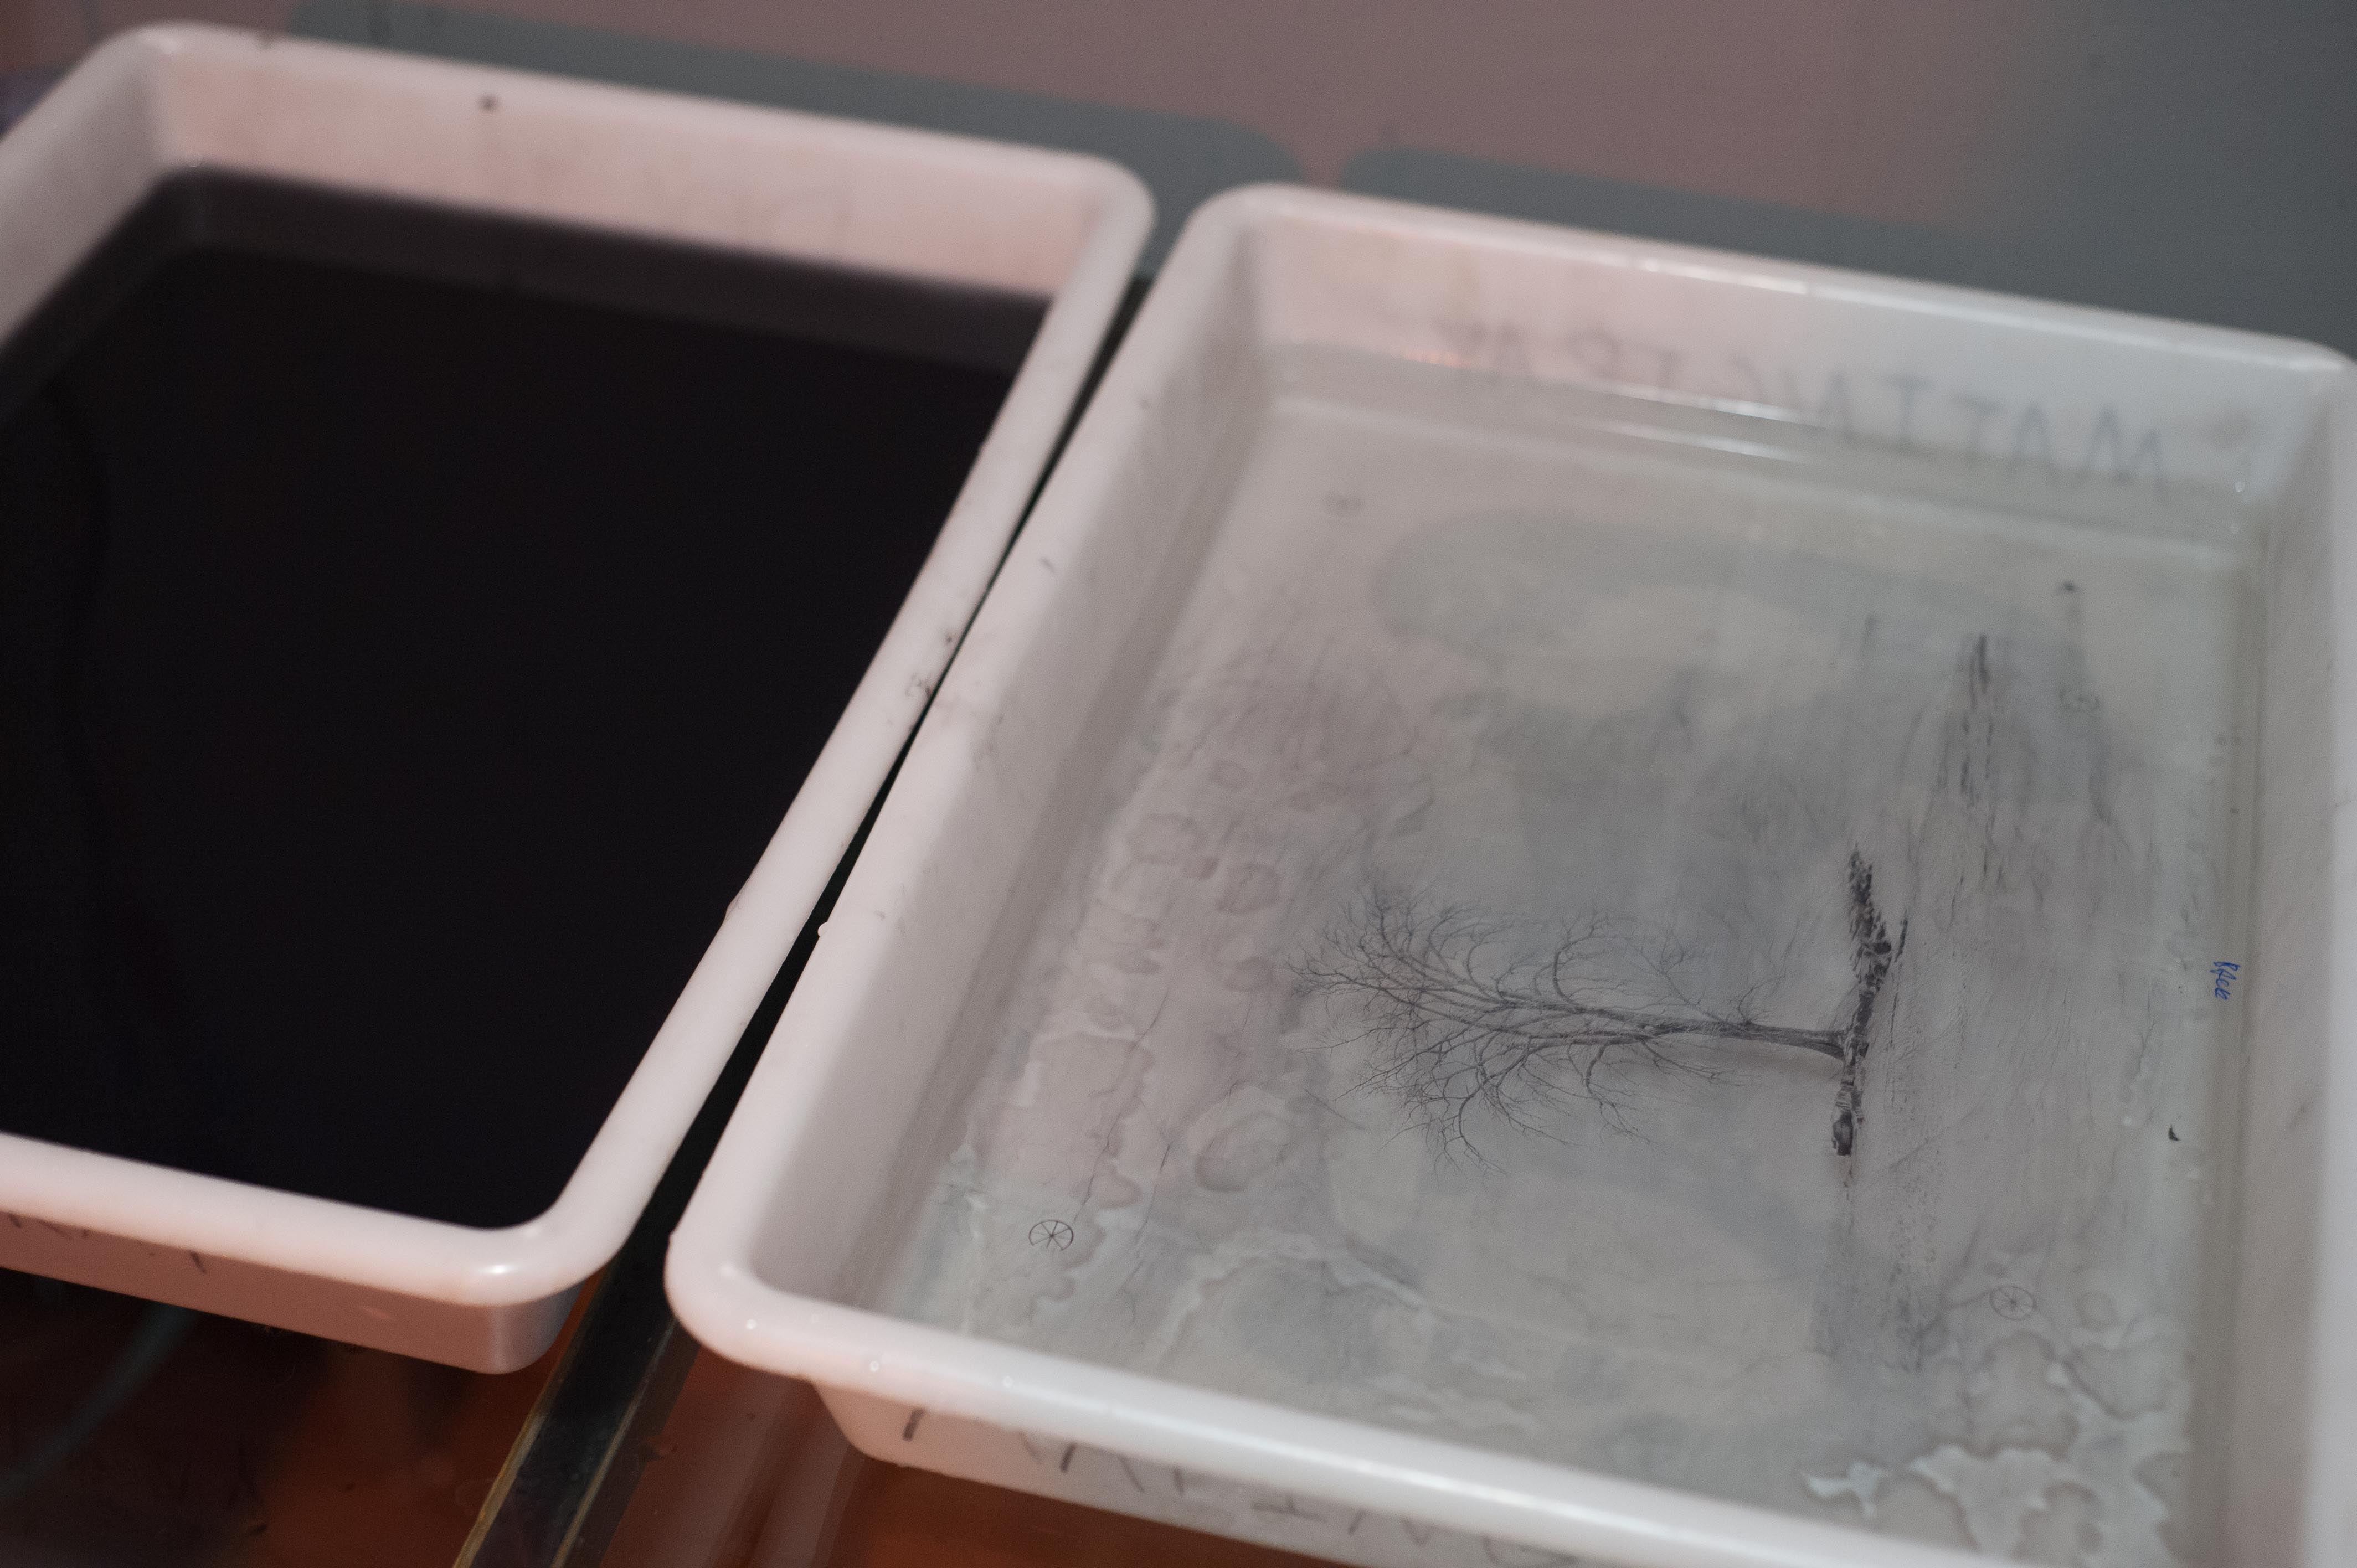
Developing the first layer.

Ken Rieves Photography

The first layer.

Ken Rieves Photography

Developing the second layer.

Ken Rieves Photography

Transferring the image from a plastic sheet to paper.

As you can see, the process used multiple layers to create the final image and is a much more complicated process than even traditionally produced photographs. Calvin’s website has videos that give you much more information as to how the images are produced.

For the photographer, the most difficult part of the process is waiting. It obviously takes time to produce the final print, but there’s also the matter of shipping (in my case shipping from Spain to the US). It took just over two weeks for me to receive the print, but it was well worth it.

First of all, the packaging was bulletproof. Which is appropriate considering the time, effort, and money invested in producing the final image.

Ken Rieves Photography

The print arrives sandwiched between two pieces of 1/4 inch thick pieces of particle board lined with foam.

Ken Rieves Photography

Inside, the photo is protected by a glassine envelope.

Finally, I took the finished print to Frames Unlimited to get it matted and framed. Just a tip: when framing anything you care about behind glass, use museum glass. The difference is completely remarkable.

Ken Rieves Photography

The final image. Without museum glass the glare would render the photo unrecognizable.

I’ve decided have another image printed as a companion image that will be hung in our formal living room.

That’s it for today, be sure to check out The Wet Print‘s website to learn more about the process. I highly recommend it!

Thanks!

-Ken.

The new Leica M10 is out.

On January 19th Leica released the new M10, the successor to the model M (type 240). I have shot with the M for about 3 years now and still love the camera. I was anxious to hear the reviews of the new model to see if upgrading was something I would be interested in down the road.

After reading a bunch of reviews (but without actually shooting with the new M10), here is my preliminary conclusion. If I was purchasing my first Leica, I would be very excited about getting the M10. If I had the resources to upgrade and trade cameras often, I’d also be excited about getting the M10. However, as a photographer who enjoys the craft and particularly enjoys shooting with rangefinders, I don’t see that the new camera offers a compelling incentive to upgrade from my M.

Let me explain. I am a member of an online community of Leica photographers known as The Leica Meet. Every year they publish a book of some of the best photos shot with Leica cameras. (I was fortunate to have one of my photos selected for publication in 2015). When you look at the cameras and lenses used, you quickly realize that they played a minor role in creating the images. The quality of the photos was much more dependent on the photographer than the camera.

While some photos were taken with latest Leica model cameras and lenses, many where shot using cameras 8-10 years old and with lenses that may be a decade old or more.

So, while the new camera may be an object of desire for you (as it is with me), it will not make significantly better photos than most of the older models in the hands of a good photographer.

All that said, I can’t post without also adding an image to my blog. 🙂

© Ken Rieves Commercial Photography

Stormy weather on Lake Erie. Leica M and 50mm Summicron.

There are lots of new reviews of the new Leica M10 online, you should have any problems getting technical information or descriptions of hands on experiences. Just remember, it’s the photographer that ultimately creates the image, not the camera.

Thanks for reading!
Ken.

Huntington Beach

Just down the road from where I live is a beach on Lake Erie called Huntington Beach. It is named for the previous owner of the land, John Huntington. I was there yesterday and photographed a lone tree that grows in an unlikely place on the beach. Standing at this tree and looking east you are greeted with a view of downtown Cleveland across a stretch of Lake Erie.

Commercial Photography by Ken Rieves

Photographed with a Leica M and 50mm Summicron Lens.

Thanks for reading!

-Ken.

Sunrise… Sunset

Shooting in the Winter in Northeastern Ohio gives you some interesting skies. One reason is that you get interesting weather patterns coming off Lake Erie, but also the latitude means the sun stays a little lower in the sky and creates beautiful sunrises and sunsets. Here are some examples.

Ken Rieves Photography

Sunrise. A new day, a new year. Shot with a Leica M and 50mm Summicron. ©Ken Rieves.

This next shot is quite a contrast to the last one, not just because it’s a sunset rather than a sunrise.

Ken Rieves Photography

Sunset. Shot with a Leica M and 90mm Summicron. ©Ken Rieves.

And finally, a shot from last winter of frozen Lake Erie showing how dramatic the sky appears.

Ken Rieves Photography

Cold Winter Sky. Shot with a Leica M and 35mm Summicron. ©Ken Rieves.

Thanks for reading!

-Ken.

Action Photography with a Rangefinder?

In October, I was for fortunate to attend the Cleveland area Dog Agility Trials. If you don’t know what Agility Trials are, you are not alone. They are often referred to a dog show, but they are far from it. They are athletic competitions for dogs. The dogs negotiate an obstacle course while being timed. The fastest dog in their class wins. The courses consist of jumps tunnels, chicanes, and other difficulties.

It is really impressive the amount of training that goes into these dogs and the patience of the owners. It obviously takes a long time to train a dog to do this. I think the most satisfying part of the trial is when a dog finishes a run. No matter how well they did, you can tell they are having the time of their lives.

I brought my Leica to the event, knowing that my Canon would be easier to use to capture action. Even when my eyes were younger, I could never focus as fast as autofocus. Plus, with the Leica, I was limited to using a 90mm Summicron lens – I had to use a foot zoom. (I guess it was a combination of wanting a challenge as well as I just really enjoy shooting my Leica). Here are a couple of shots from the event:

Ken Rieves Photography

A Standard Poodle Attempting a Jump. © Ken Rieves Photography

Ken Rieves Photography

An Australian Shepard Clearing a Jump. © Ken Rieves Photography

I found the easiest way to shoot was to pick a certain distance in which to set focus where I anticipated action (in this case a jump), then wait for the action to come to me. It’s easier with a rangefinder because you can see outside the frame lines. It makes timing the shutter much more precise since you can see the action before it gets there.

So if you get a chance to see an Agility Trial, take advantage of it, it’s a great way to spend an afternoon. Thanks for reading!

-Ken

Every now and then, it helps to re-discover the past.

As fun as it is to look at all the wonderful photography that is currently being produced, sometimes we can use a look at the past to give us perspective. Most photographers are familiar with HCB, Capa, Winogrand, Nachtwey, and other pioneers. They were/are ground breakers in their respective styles and genres.

However, if we go back further, we can see impressive, groundbreaking work by earlier pioneers who not only developed new styles of photography, but also new techniques of shooting, processing, and printing of images. This group of photographers also pushed photography into the category of art. Previously, photography was used to document events and record portraits, but was never truly considered an art form. To some in the art world, photography was considered a parlor trick using light and chemistry.

At the turn of the last century Alfred Stieglitz, a photographer, writer, and publisher, started a movement among fellow photographers called Photo-Secession. (In a nutshell, Photo-Secession looked photography as more than just capturing the likeness of a person, scene, or event, but as a creation of the photographer which may include manipulation of the image to realize his/her vision.) A photo magazine called Camera Work (1903 – 1917) was published to show their work. Some of the photographers whose work appeared in the magazine were Eduard Steichen, Gertrude Kasebier, Clarence White, and many others.

You have to remember, in 1903, you didn’t have a corner drugstore that could process you film. You had to do it all yourself. Film didn’t come in rolls, it was made in sheets. Whenever you decided to hit your shutter release, you have to be sure that everything was right, because processing and printing that photo was a commitment of time and money.

Camera Work magazine is now a collector’s item and an intact issue can run several thousands of dollars. But, luckily, all the images from the magazine are available in a book that is still in print.

Photo by Ken Rieves

Alfred Stieglitz – Camera Work, published by Taschen

If you get a chance, pick up a copy of this book, it will be a welcome addition to your library and be a great source of inspiration. It’s available from the publisher here and also from Amazon here.

Sometimes the clearest view of the future comes after studying the past. Thanks for reading!

-Ken.

Loading...
X